How to Gather a Network Advisor Server Application SupportSave
Objective
This article will explain how data needs to be collected when there are problems with Brocade Network Advisor (BNA) Software.
Environment
Brocade Network Advisor (BNA)
Procedure
There are different ways to collect data:
- If you have an issue with the client you need the BNA client SupportSave + the BNA server SupportSave + technical SupportSave from affected/involved switch(es).
- If there is an issue with the BNA server you need to collect the BNA Server SupportSave which could be done in three ways.
- In this article we only describe how the BNA server SupportSave gets collected. It is also useful to collect a switch SupportSave that is related to the issue (Brocade Data Collection). It is also helpful to note if there is any time difference between the server time and the switch time.
NOTE: Without a timeline and/or screenshots of the events it is nearly impossible to review the data. Ensure that you open a case based on the serial number of BNA instead of a switch serial number.
Collect BNA Server SupportSave via GUI
- Login in at the BNA Server to the BNA GUI. In windows Start -> All Programs -> Brocade Network Advisor XX.X.X -> Network Advisor XX.X.X
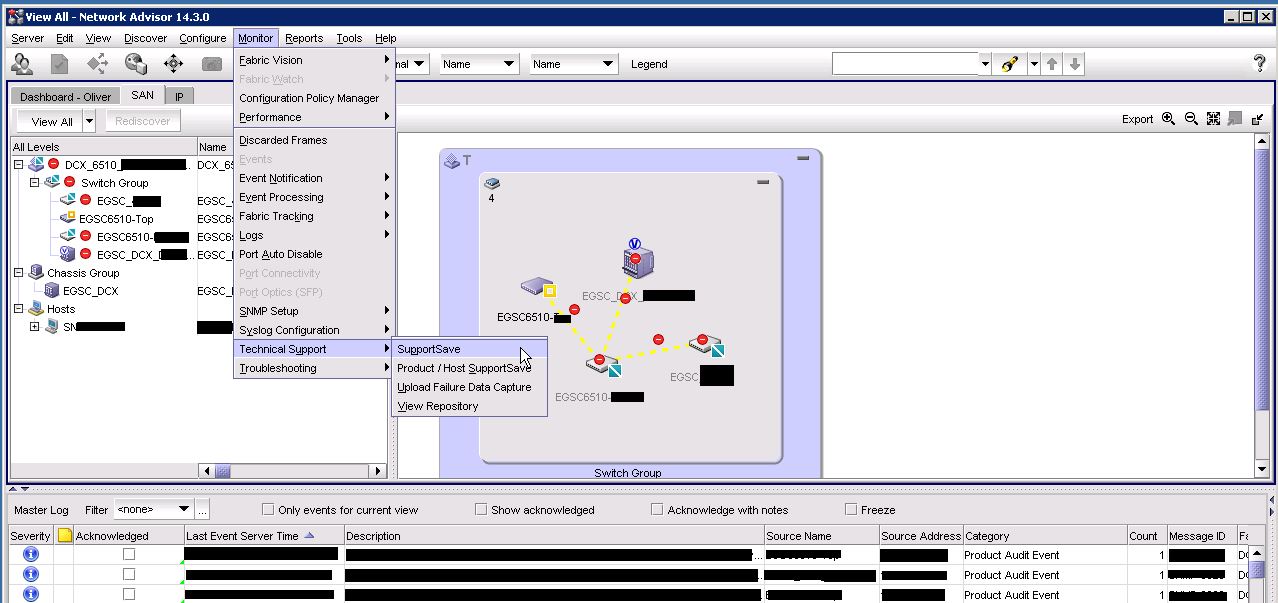
- Go to the menu Monitor -> Technical Support -> SupportSave (this is for the BNA Software, for switch SupportSave you need to select Product / Host SupportSave).
- We usually request the full BNA SupportSave, including the database. So ensure that the checkboxes are set as followed:
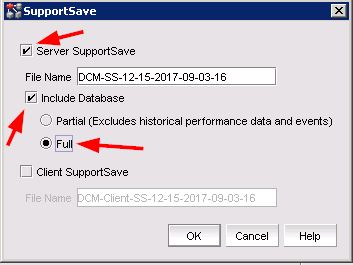
- Click OK and BNA will start collecting the BNA Server SupportSave.
Collect the BNA Server Supportsave via Server Management Console
This might be needed if a login via GUI is not possible.
- In Windows go to Start -> All Programs -> Network Advisor XX.X.X -> Server Management Console.
- Once the Management Console is loaded go to the Tab 'Technical Support Information'. Select the options 'Include database' and 'Full'.
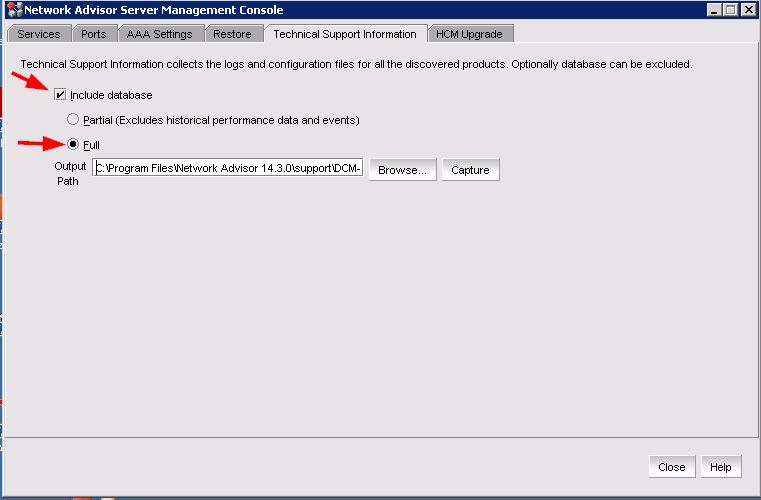
- Click on Capture and BNA will start collecting BNA Server SupportSave data.
Collect the BNA Server SupportSave via Command Line
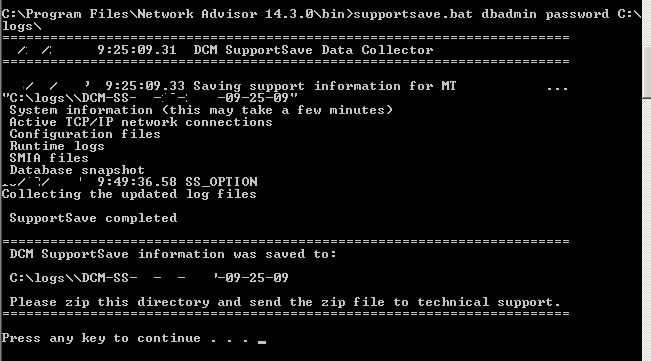
- At the command line go into the directory where BNA is installed. In Windows C:\Program Files\Network Advisor XX.X.X\ to the folder bin. In this folder is a supportsave.bat file
- You need the database user and password to run the SupportSave.
Example: supportsave.bat dbadmin password C:\logs\ - Once completed you will find the BNA Server SupportSave data under C:\logs\. Data is not compressed so you need to zip them into a file(s).
NOTE:
Default name for a BNA Server SupportSave is DCM-SS-<timestamp>.zip
Default Directory for BNA SupportSave data is the installation directory of BNA in the support folder.
Collect the BNA client SupportSave via Command Line
Use the following procedures to capture client support save files through the command line interface (CLI).
Capturing client support save using the CLI (Windows)
To capture client support save files through the CLI, complete the following steps.
- Go to the following location:
- (Local client) User_Home/Management_Application_Name/localhost
- (Remote client) User_Home/Management_Application_Name/Server IP
- Run the clientsupportsave.bat file.
- Define a capture location by typing clientsupportsave in the CLI. If the path has spaces, enclose it in double quotes.
By default, the capture location is one of the following:- (Local client) User_Home/Management_Application_Name/localhost
- (Remote client) User_Home/Management_Application_Name/Server IP
- Use an archive tool to create a ZIP file of the support save.
Capture client support save using the CLI (Linux)
To capture client support save files through the CLI, complete the following steps.
- Go to /root /Management_Application_Name_Folder/Server IP.
- Run the clientsupportsave.sh file.
- Define a capture location by typing sh clientsupportsave in the CLI. If the path has spaces, enclose it in double quotes.
By default, the capture location is /root /Management_Application_Name_Folder/Server IP/support. - Use an archive tool to create a ZIP file of the support save.
Additional Notes
- What_Are_the_Different_Types_of_Supportsave_Data
- Brocade_Data_Collection
- How_to_Gather_a_Network_Advisor_Server_Application_SupportSave
- How_to_Collect_the_Brocade_Network_Advisor_(BNA)_SupportSave_If_Unable_to_Open_a_Client_Session
Hitachi Vantara Product Life-cycle Matrix
- Customers with Brocade Data Center Fabric Manager (DCFM) should migrate to BNA since Brocade announced End of Support: 3/28/2018
- Customers with Brocade Network Advisor (BNA) should migrate to SANnav since Brocade announced End of Support: 02/08/2022
- Customers with Brocade Network Advisor (BNA) versions older than 14.4.1 should upgrade preferable to 14.4.5 as Brocade announced Unsupported as per policy.
- Brocade Product End-of-Life
- Brocade Software release Support and Posting Matrices
- Hitachi Vantara Product Life-Cycle Matrix